Dot markers are an amazing art tool for toddlers, encouraging creativity, improving fine motor skills, and making art enjoyable. Whether you’re at home or in the classroom, dot markers are perfect for little hands to experiment with colors, shapes, and textures. If you’re wondering how to use dot markers effectively, this guide will walk you through everything you need to know to get started with these fun and mess-free art supplies!
1. Gather Your Materials
Before diving into dot marker fun, make sure you have everything ready:
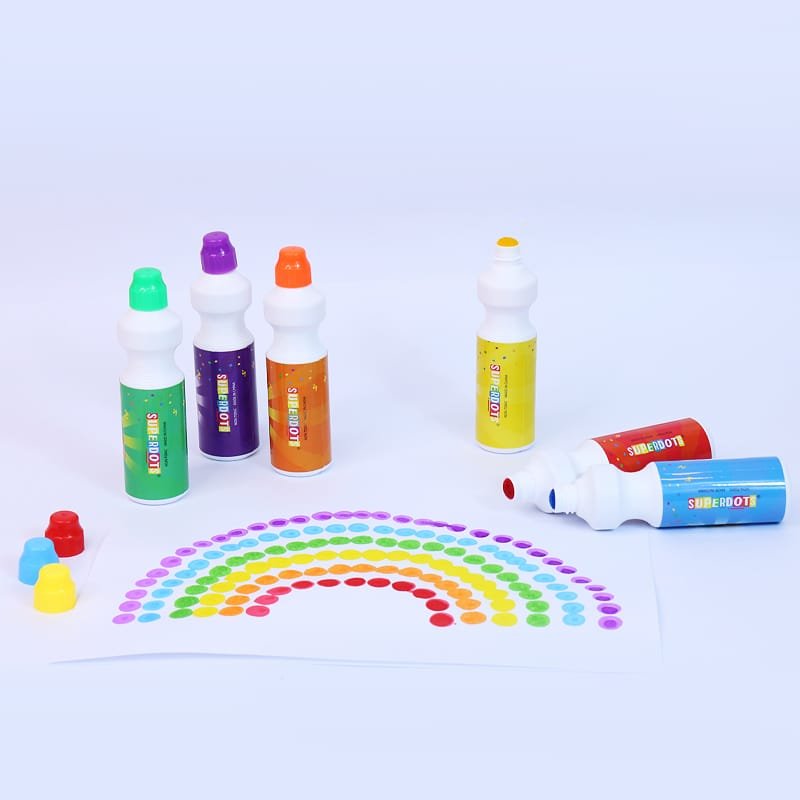
- Dot Markers: Choose a set with a variety of vibrant colors. If you’re looking for high-quality markers, consider using Superdots Dot Markers, designed specifically for young children.
- Paper: Pick thick, non-porous paper to prevent bleeding (construction paper works great).
- A Clean Surface: Lay down a protective sheet or newspaper to catch any spills (although dot markers are relatively mess-free).
2. Activate Your Dot Markers
Unlike regular markers, dot markers need a little activation to get them started. Here’s how to do it:
- Shake the Marker: Hold the cap on and give the marker a good shake to get the ink flowing.
- Remove the Cap: Twist off the cap once you’re ready to begin.
- Press on Paper: Gently press the tip onto the paper, and you should see the ink start to flow. Now, you’re ready to start stamping!
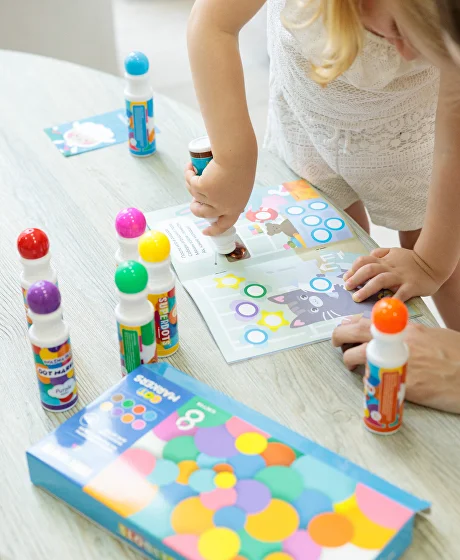
3. Hold the Marker Correctly
Dot markers are designed with little hands in mind. The thick, chunky barrel makes them easy for toddlers to grip and control. Encourage your child to hold the marker firmly near the end, as this helps with proper control and prevents frustration.
4. Start Creating Dots
To create the iconic “dot” art, gently press the tip of the marker onto the paper. You can make single dots or a pattern by adding more dots close together. Encourage your child to experiment with different colors and see how the dots look when layered.
- Single Dots: Start with one dot at a time for simple designs.
- Patterned Dots: Try arranging the dots in rows, circles, or even creating shapes like hearts or stars.
5. Explore Shapes and Lines
Once your toddler feels comfortable making dots, you can move on to creating simple shapes or lines. Dot markers are perfect for forming outlines or even filling in shapes.
- Shapes: Help your child draw shapes like circles, squares, and triangles by outlining them with dots.
- Lines: Show how to make straight or curved lines by adding dots in a continuous pattern.
6. Layering and Blending Colors
Dot markers offer endless opportunities for mixing colors. Show your child how to layer different colors of dots on top of each other. This will help create texture, depth, and vibrant effects in their artwork.
- Layering Colors: Let your child experiment with layering two or more colors in a pattern, such as alternating colors for a fun, rainbow-like effect.
- Blending Colors: Encourage your child to press dots of different colors right next to each other, allowing the colors to blend slightly and create a new look.
7. Dot-to-Dot Activities
Incorporating learning into the art activity can be a fun way to use dot markers. Dot-to-dot activities can help toddlers practice numbers, letters, and even shapes. Draw a simple number or letter sequence, and have your child connect the dots to form the shape or letter.
- Counting: Create a dot-to-dot activity where each number corresponds to a dot. This helps with number recognition and counting skills.
- Shape Recognition: Draw dots in the shape of a square, triangle, or circle, and have your child trace them to recognize the shape.
8. Clean Up and Care for Dot Markers
Dot markers are relatively easy to clean, but here are a few tips to keep them in good condition:
- Wash Hands and Surfaces: Dot markers are water-based, so if they get on hands or surfaces, simply wash with soap and water.
- Cap Markers When Not in Use: Be sure to twist the cap back on after each use to prevent the ink from drying out.
- Store Upright: Keep dot markers stored upright to ensure the ink stays at the tip and doesn’t dry out.
9. Removing Dot Marker Stains
If your child gets dot marker ink on their clothes or hands, don’t worry! Dot marker stains are easy to remove:
- For Hands: Simply wash with soap and water, and the ink should come off easily.
- For Clothes: Rinse the stained area with warm soapy water and wash as usual. Most stains should come out in the wash.
Conclusion
Dot markers are an excellent tool for toddlers to explore their creativity, improve fine motor skills, and develop early learning skills. If you’re looking for high-quality dot markers, Superdots Dot Markers are a great option for their vibrant colors and child-friendly design. As a leading dot marker factory, we at Superdots pride ourselves on creating safe and fun products for kids to enjoy. With easy-to-use designs and a variety of fun activities, dot markers make art time enjoyable for both kids and parents. So grab your markers, gather some paper, and let your child’s imagination run wild as they create their next masterpiece!